Verify a Smart Contract on FunkiScan
FunkiScan is a block explorer tailored for Funki Mainnet, offering developers a platform to interact with and verify smart contracts deployed on the network. Smart contract verification is essential for ensuring the transparency and security of on-chain applications, allowing others to review and validate the source code of deployed contracts. This tutorial will guide you through popular methods to verify a contract, as several approaches are available.
FunkiScan uses the RouterScan API for contract verification. Currently, no API key is required, and your requests fall under their free plan.
- As of writing these docs, the RouteScan API free tier allows you to use the API without an API key, offering up to 2 requests per second (rps) and a daily limit of 10,000 calls. Read more at RouterScan API Plans
- To verify a contract on Funki Devnet, simply switch the chain information to Funki Devnet. Currently, Funki Devnet is an L2 of Sepolia Devnet, and its explorer is publicly available at Funki Devnet Explorer
Objectives
By the end of this tutorial, you should be able to:
- Verify your deployed contract with popular Frameworks and toolkits.
- Verify contract directly on FunkiScan.
Prerequisites
Familiarity with smart contract development and the Solidity programming language Solidity is the primary language for writing smart contracts on Ethereum and Ethereum-compatible blockchains like Funki. You should be comfortable writing, compiling, and deploying basic smart contracts using Solidity. Basic understanding of popular frameworks and toolkits for Ethereum development Frameworks and toolkits streamline the process of deploying, testing, and interacting with smart contracts. You should be familiar with popular smart contract development tools like Hardhat, Foundry
Hardhat verification
hardhat-verify is a Hardhat plugin that simplifies the smart contract verification process on Etherscan. Thanks to the Etherscan Compatible Verify Contract API, you can also use this tool to verify your smart contract on FunkiScan.
Here's an example of a hardhat.config.ts file:
import { HardhatUserConfig } from "hardhat/config";
import "@nomicfoundation/hardhat-toolbox";
import "@nomiclabs/hardhat-verify";

const config: HardhatUserConfig = {
  etherscan: {
    apiKey: {
      funkiscan: "funkiscan", // apiKey is not required, just set a placeholder
    },
    customChains: [
      {
        network: "funki",
        chainId: 33979,
        urls: {
          apiURL: "https://api.routescan.io/v2/network/mainnet/evm/33979_2/etherscan/api",
          browserURL: "https://explorer.funkichain.com"
        }
      }
    ]
  },
  networks: {
    funki: {
      url: 'https://rpc-mainnet.funkichain.com',
      accounts: [process.env.PRIVATE_KEY]
    },
  },
};

export default config;
Deploy
npx hardhat run scripts/deploy.ts --network funki
Verify
export PRIVATE_KEY=...
npx hardhat verify --network funki 0x...
Foundry verification
Foundry allows you to verify contracts either during deployment or as a separate step. Be sure to include the --verifier-url option in your deploy or verify script.
To verify at deployment time:
forge script scripts/Deploy.s.sol
--broadcast --rpc-url [NETWORK_RPC_URL]
--verifier-url 'https://api.routescan.io/v2/network/mainnet/evm/33979_2/etherscan/api'
--etherscan-api-key "verifyContract"
To verify a contract that has already been deployed:
forge verify-contract [contract-address] [src/path/ContractPath.sol:ContractName]
--verifier-url 'https://api.routescan.io/v2/network/mainnet/evm/33979_2/etherscan/api'
--etherscan-api-key "verifyContract"
--num-of-optimizations 200
--compiler-version [solc compiler version]
--constructor-args $(cast abi-encode "constructor(address param1, uint256 param2,...)" param1 param2 ...)
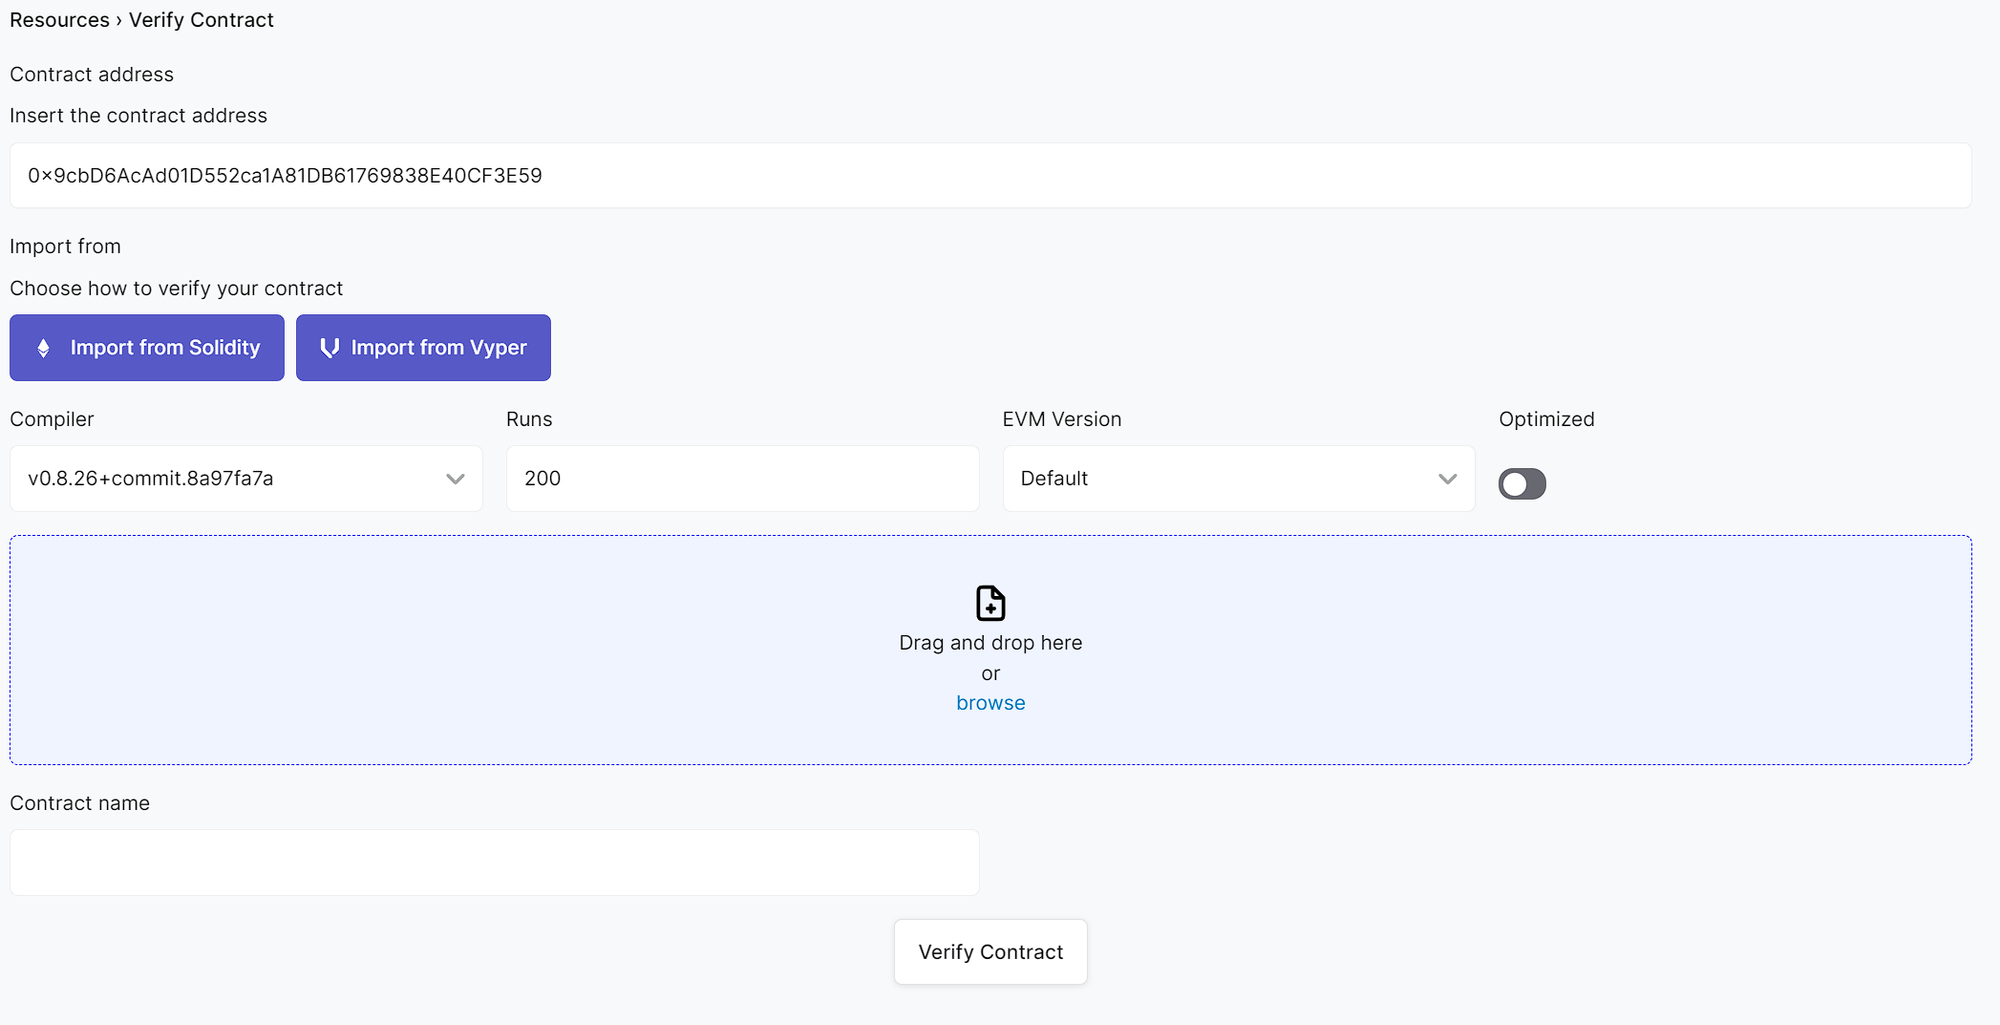
FunkiScan verify contract with files
You can verify contracts using the FunkiScan verification tool. This method is particularly useful if you've deployed your contract with Remix IDE and need to verify it.
- Step 1: Enter your deployed contract's address.
- Step 2: Choose your programming language.
- Step 3: Provide the compiler information and upload your file(s). Make sure this information exactly matches what you used when compiling your contract for deployment. You can upload either multiple files or a single flattened file.
- Step 4: Click "Verify Contract" and wait for the result.

Interact with the Contract on FunkiScan
You can now interact with your contract using FunkiChain. Click the Contract tab. If your contract is verified, you'll see the contract's source code and all its functions under the Read Contract and Write Contract buttons. Note that only write functions require an on-chain transaction.
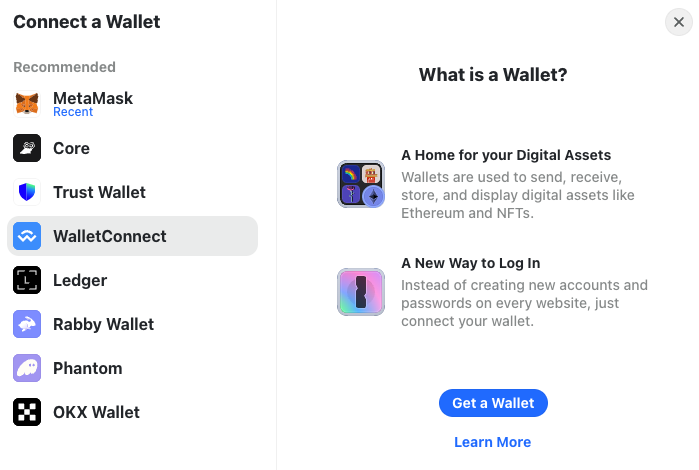
To interact with write functions, you need to sign in to FunkiChain with your wallet. Currently, you can choose from any of the supported wallet providers that appear.

Once connected, you're all set to interact with any write function of the contract. Make sure your input is correct and double-check the transaction details before confirming any transaction.
Conclusion
Congratulations! You've now mastered the art of deploying smart contracts to the blockchain. While you've only deployed to a test network so far, the process for real networks is identical—just remember, it comes with a heftier price tag!