Deploying a smart contract using Remix
Remix is a web-based Integrated Development Environment (IDE) designed for efficient smart contract development and deployment. It serves as an excellent starting point for those new to smart contracts, eliminating the need for complex local environment configurations.
Remix features an in-browser blockchain simulator, enabling swift contract deployment and testing. While this simulation is limited to your browser environment, Remix also facilitates deployment to various testnets. This functionality allows for public sharing of your contract, albeit with the consideration that your code becomes visible to others.
This article will provide a comprehensive overview of Remix and guide you through the process of deploying a contract to the FunkiDevnet.
For production or mainnet deployments, the steps in this tutorial are nearly identical. However, you'll need to ensure you've selected FunkiMainet as the network instead of FunkiDevnet.
If you're already familiar with Remix, you probably want to jump down to here.
Objectives
By the end of this tutorial, you'll be able to:
- Understand Remix's features, advantages, and limitations as an IDE
- Deploy and test the Storage.sol demo contract using Remix
- Deploy a contract to the FunkiDevnet using Remix and interact with it
Remix Window Overview
To begin, open a browser window and navigate to https://remix.ethereum.org. After navigating through the introductory tips, you'll encounter the editor, which is neatly divided into three familiar sections.
Editor Pane
The editor pane initially showcases the Remix home screen, complete with news, useful links, and cautionary notes about prevalent scams. Feel free to dismiss the home tab and open 1_Storage.sol, which resides in the contracts folder within the default_workspace.
// SPDX-License-Identifier: GPL-3.0

pragma solidity >=0.7.0 <0.9.0;

/**
 * @title Storage
 * @dev Store & retrieve value in a variable
 * @custom:dev-run-script ./scripts/deploy_with_ethers.ts
 */
contract Storage {

    uint256 number;

    /**
     * @dev Store value in variable
     * @param num value to store
     */
    function store(uint256 num) public {
        number = num;
    }

    /**
     * @dev Return value
     * @return value of 'number'
     */
    function retrieve() public view returns (uint256){
        return number;
    }
}
You'll edit your code in the editor pane. It offers most of the features you'd expect, including syntax highlighting and error detection. However, in Remix, errors aren't underlined. Instead, you'll see an ❗ icon to the left of the line number where an error occurs.
At the top, you'll notice a large green arrow, similar to the Run button in other editors. In Solidity, this button compiles your code but doesn't run it. That's because you must first deploy your code to the simulated blockchain before execution.
Terminal/Output
Below the editor pane, you'll find the terminal.

This panel primarily displays transaction logs from your smart contracts and provides access to Remix's powerful debugging tools.
Left Panel
Similar to many other editors, Remix's left panel contains several vertical tabs for navigating between tools and functions. This panel allows you to browse files in your current workspace, manage workspaces, search your code, and access a variety of plugins.
Plugins
Remix's functionality relies heavily on plugins, with the most common ones activated by default. To manage plugins, click the plug icon in the lower-left corner, just above the settings gear. You can easily toggle plugins on or off by clicking "activate" or "deactivate." Some plugins, such as the Debug tool, automatically activate when needed through other parts of the editor.
Solidity Compiler
The first default plugin (after the search function) is the Solidity Compiler. Be sure to enable the Auto compile option. Smart contracts are typically very small files, so this shouldn't cause any performance issues while editing code.
The Compile and Run script button in this plugin can be misleading. It's important to note that this is not the usual method for testing your contract. For more information on this feature, click the I button.
If your contracts contain errors, you'll find the complete error messages at the bottom of the page. To see this in action, try introducing some typos into 1_Storage.sol.
Deploy & Run Transactions
The "Deploy & Run Transactions" plugin is your primary tool for deploying and interacting with contracts. At the top, you'll see options to select your virtual machine, create mock user wallets with test Ether, and a dropdown menu for choosing the contract you want to deploy and test.
After fixing any errors in 1_Storage.sol, click the orange Deploy button. Your contract will appear below as STORAGE AT <address>
Deploying contracts in Remix can be tricky due to two potential pitfalls:
- Each time you click the Deploy button, Remix creates a new instance of your contract while retaining previous deployments. Unless you're comparing versions or deploying multiple contracts, it's best to click the
Trashbutton to remove old deployments before deploying again. - If your code fails to compile, clicking Deploy won't trigger an error message! Instead, Remix will deploy the last successfully compiled version. Always check for errors—indicated by a red circle with a number on the Compiler plugin—before deploying.
Prepare for Deployment
Testnets closely mirror their corresponding main networks, but with a few key distinctions. To interact with a testnet—whether you're deploying a new contract or calling functions in an existing one—you'll need a wallet loaded with the appropriate testnet tokens.
Set Up a Wallet
If you've already set up a wallet exclusively for development, feel free to skip ahead. If not, now's the perfect time to take the plunge!
Using a wallet with valuable assets for development is extremely risky. You might inadvertently write code with a bug that transfers incorrect amounts or tokens to the wrong addresses. Remember, blockchain transactions are irreversible once sent! Stay safe by using separate wallets for different purposes.
First, add the Coinbase or MetaMask wallet to your browser and set up a new wallet. As a developer, you must be extra vigilant about your wallet's security! Many apps grant special privileges to the contract owner's wallet address—allowing the withdrawal of all Ether paid by customers or altering crucial settings.
After setting up your wallet, enable developer settings and activate testnets (Coinbase Settings, MetaMask Settings).
Add the FunkiDevnet to your Wallet
Most wallets include the FunkiDevnet as one of the default testnet networks. You may need to enable developer mode to view them.
For this tutorial, you'll deploy a contract to the FunkiDevnet. To fund your wallet with Funki Devnet ETH, use one of the faucets listed on the Funki Network Faucets page.
Get Testnet Ether
Testnet tokens have no real monetary value, but their supply is limited. Use a faucet to obtain a small amount of Sepolia Ether for paying gas fees during testing. Most faucets allow you to request a modest sum daily, and some will refuse to send more if your balance is already high.
It's wise to bookmark multiple faucets, which you can easily find through a simple search. This precaution helps because faucets occasionally go offline. Faucet providers often battle against malicious actors and may need to temporarily disable their services.
You can access the FunkiDevnet faucet for some test tokens.
After obtaining testnet Funki Devnet Ether, you can view your balance under the Testnets tab in the Coinbase wallet, or by selecting the testnet from the network dropdown in MetaMask. Don't get too excited, though—despite the impressive numbers you might see, it's not actually worth real money!
Deploying to Testnet
With testnet Ether in hand, you're ready to deploy the Storage contract!
Selecting the Environment
Navigate to the Deploy & Run Transactions tab. In the Environment dropdown, choose Injected Provider. This will display Coinbase, MetaMask, or any other wallet you've activated.
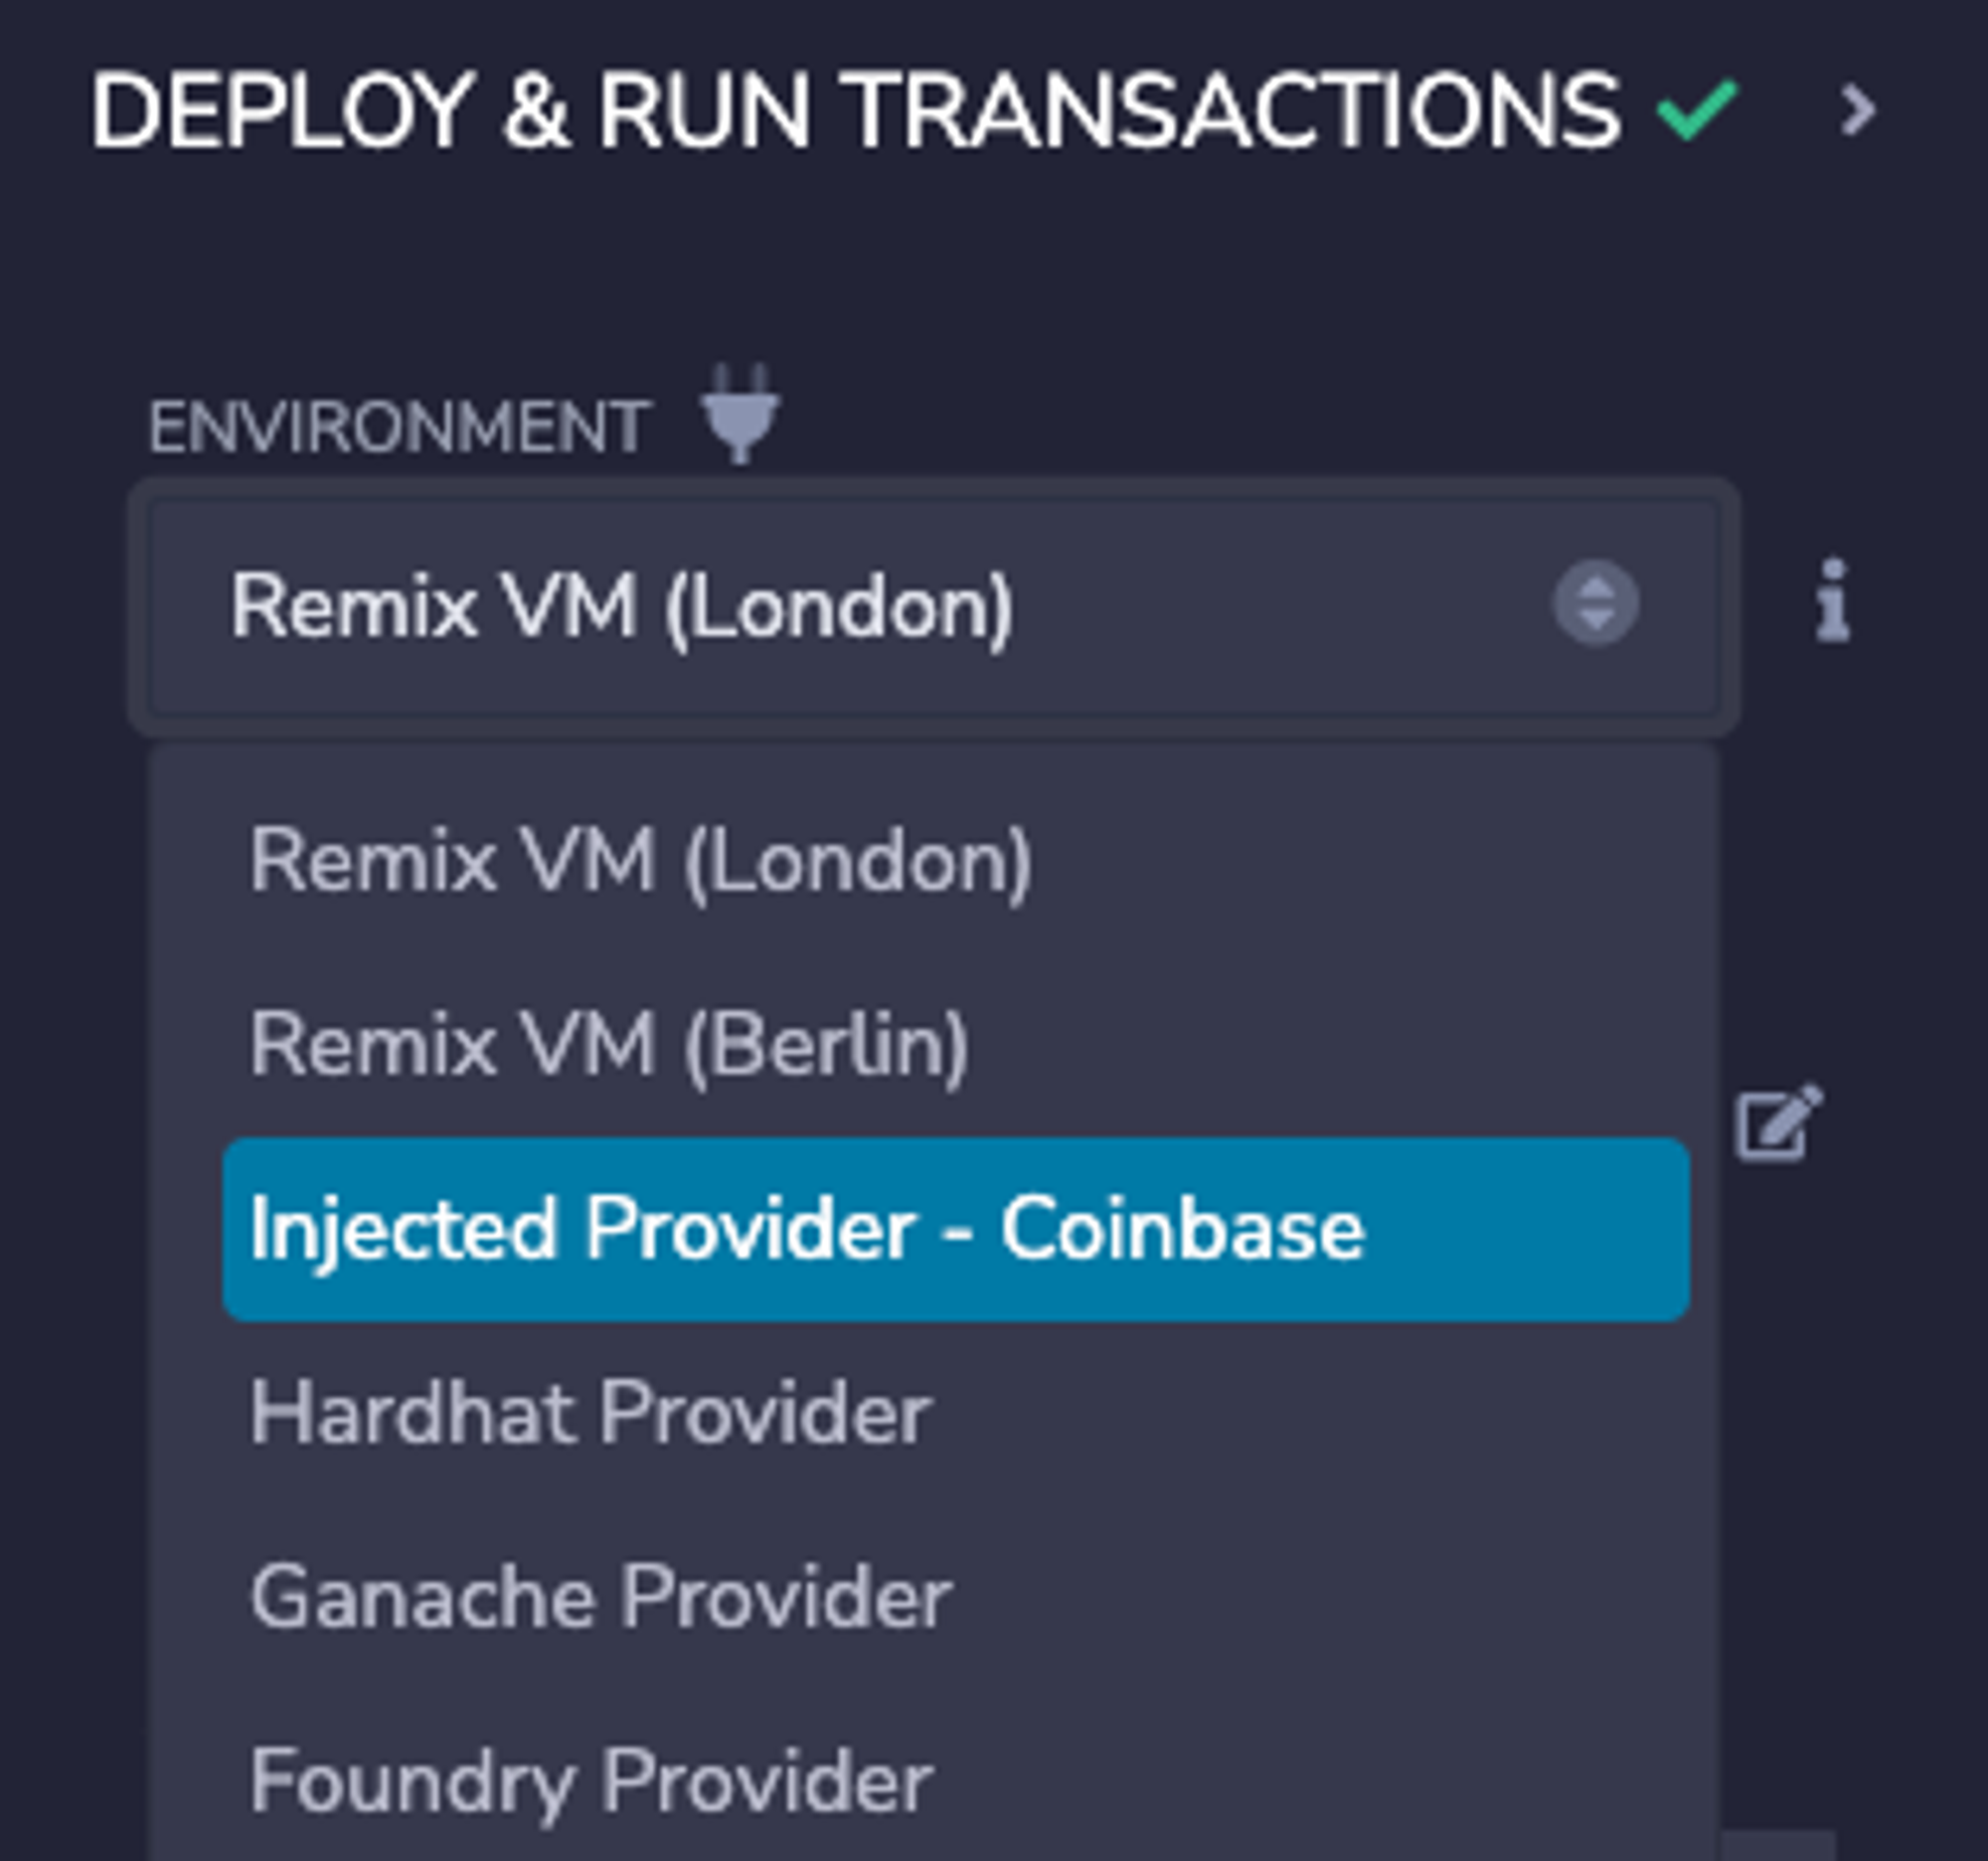
Can't find the option? No worries—just select Customize this list... to add it.
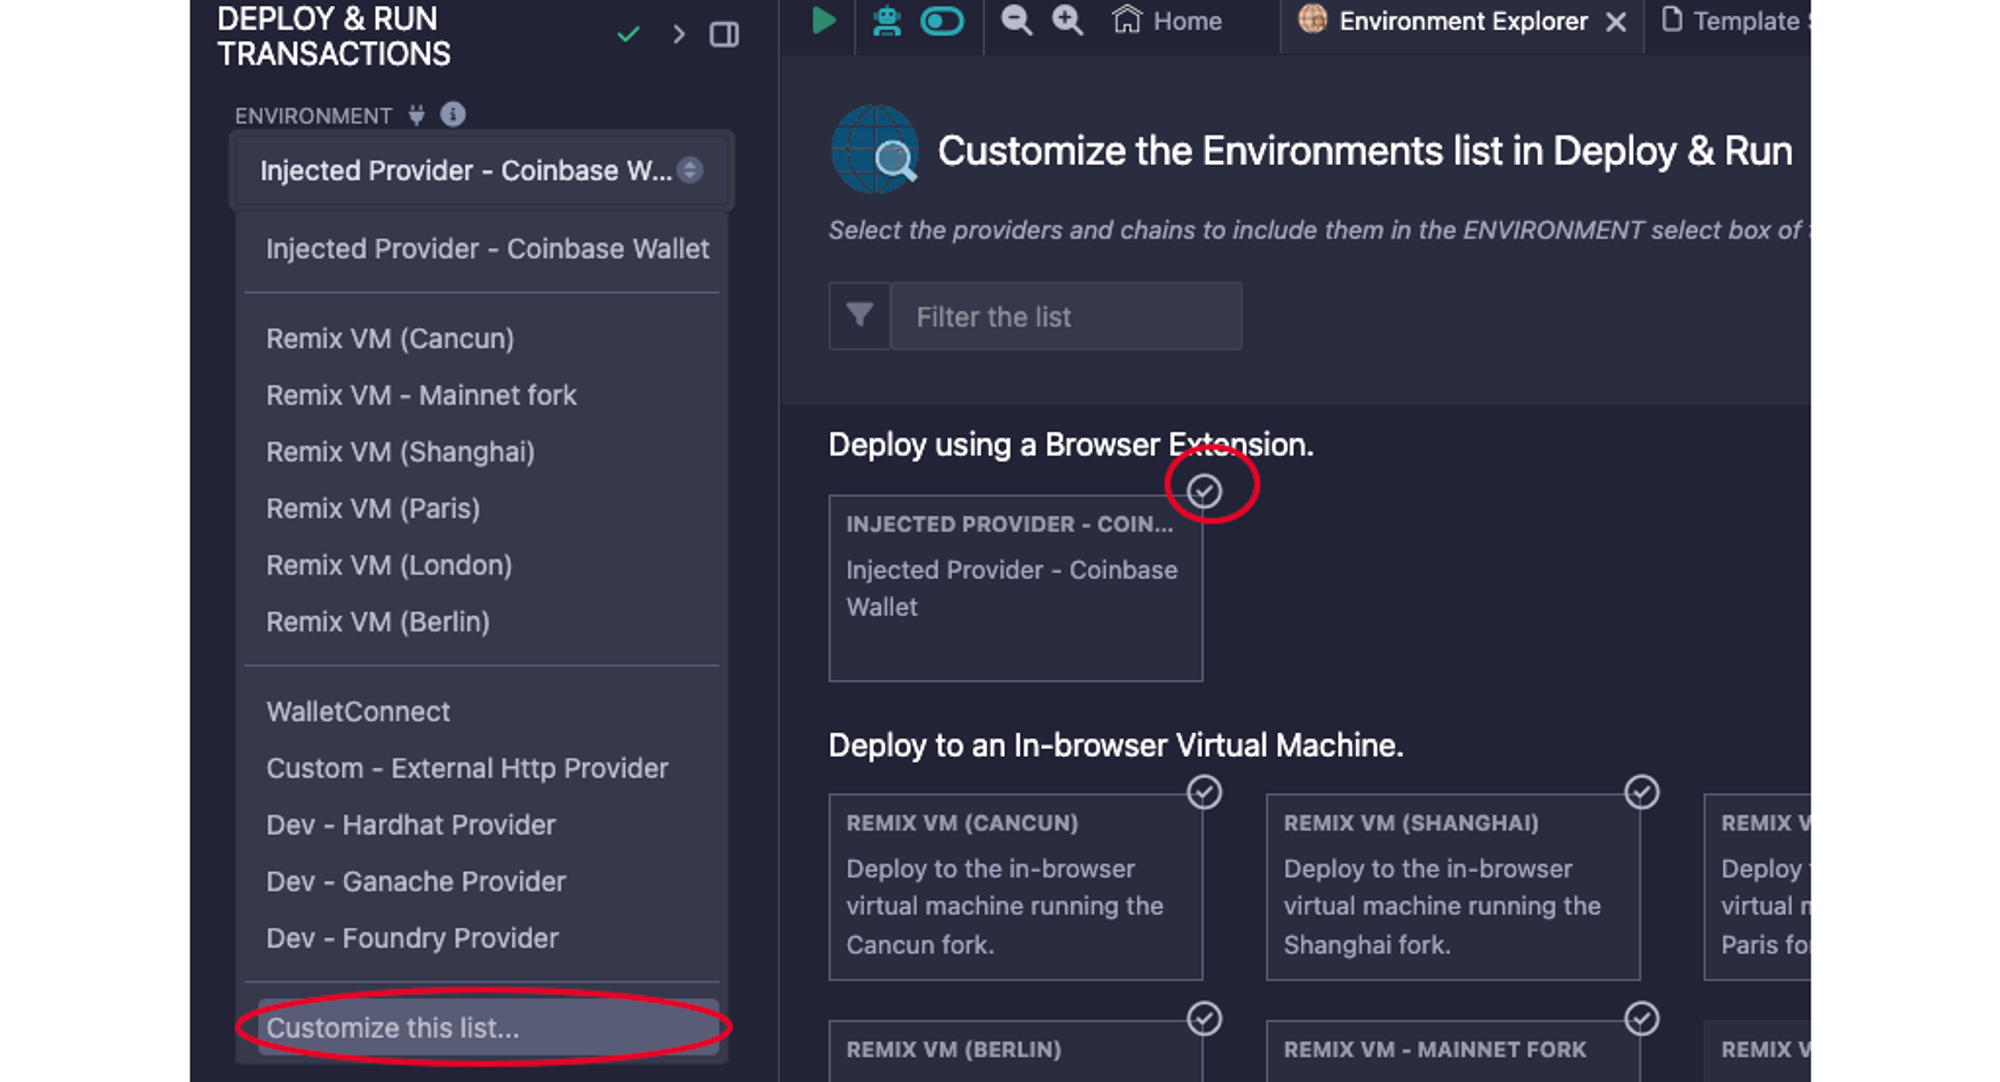
Your first connection will trigger a wallet prompt, asking you to confirm linking Remix to your wallet.
Once connected, you'll spot the network name right below the Environment dropdown.
For the FunkiDevnet, look for Custom (3397902) network. (Note: Deploying to mainnet? You'll see Custom (33979) network instead.)
If the network doesn't match, simply switch to the correct one in your wallet.
Deploy the Contract
Click the orange Deploy button. Because it costs gas to deploy a contract, you'll be asked to review and confirm a transaction.
Always carefully review all transactions, confirming the transaction cost, assets transferred, and network. As a developer, you'll become accustomed to approving transactions frequently. Make a conscious effort to avoid falling into the habit of clicking Confirm without thoroughly examining the transaction details. If you feel rushed to Confirm before time runs out, it's likely a scam.
After clicking the Confirm button, return to Remix and wait for the transaction to deploy. Copy its address and navigate to https://explorer.funkichain.com/. Note: If you deployed to mainnet, you'll navigate to https://explorer.funkichain.com/ instead.
Verify the Contract
Verifying the contract is unnecessary if you've deployed one that's identical to a previously verified contract.
You can interact with your deployed contract using Remix as before, but it's also possible to interact through FunkiScan. Simply paste your contract's address in the search field to locate it.
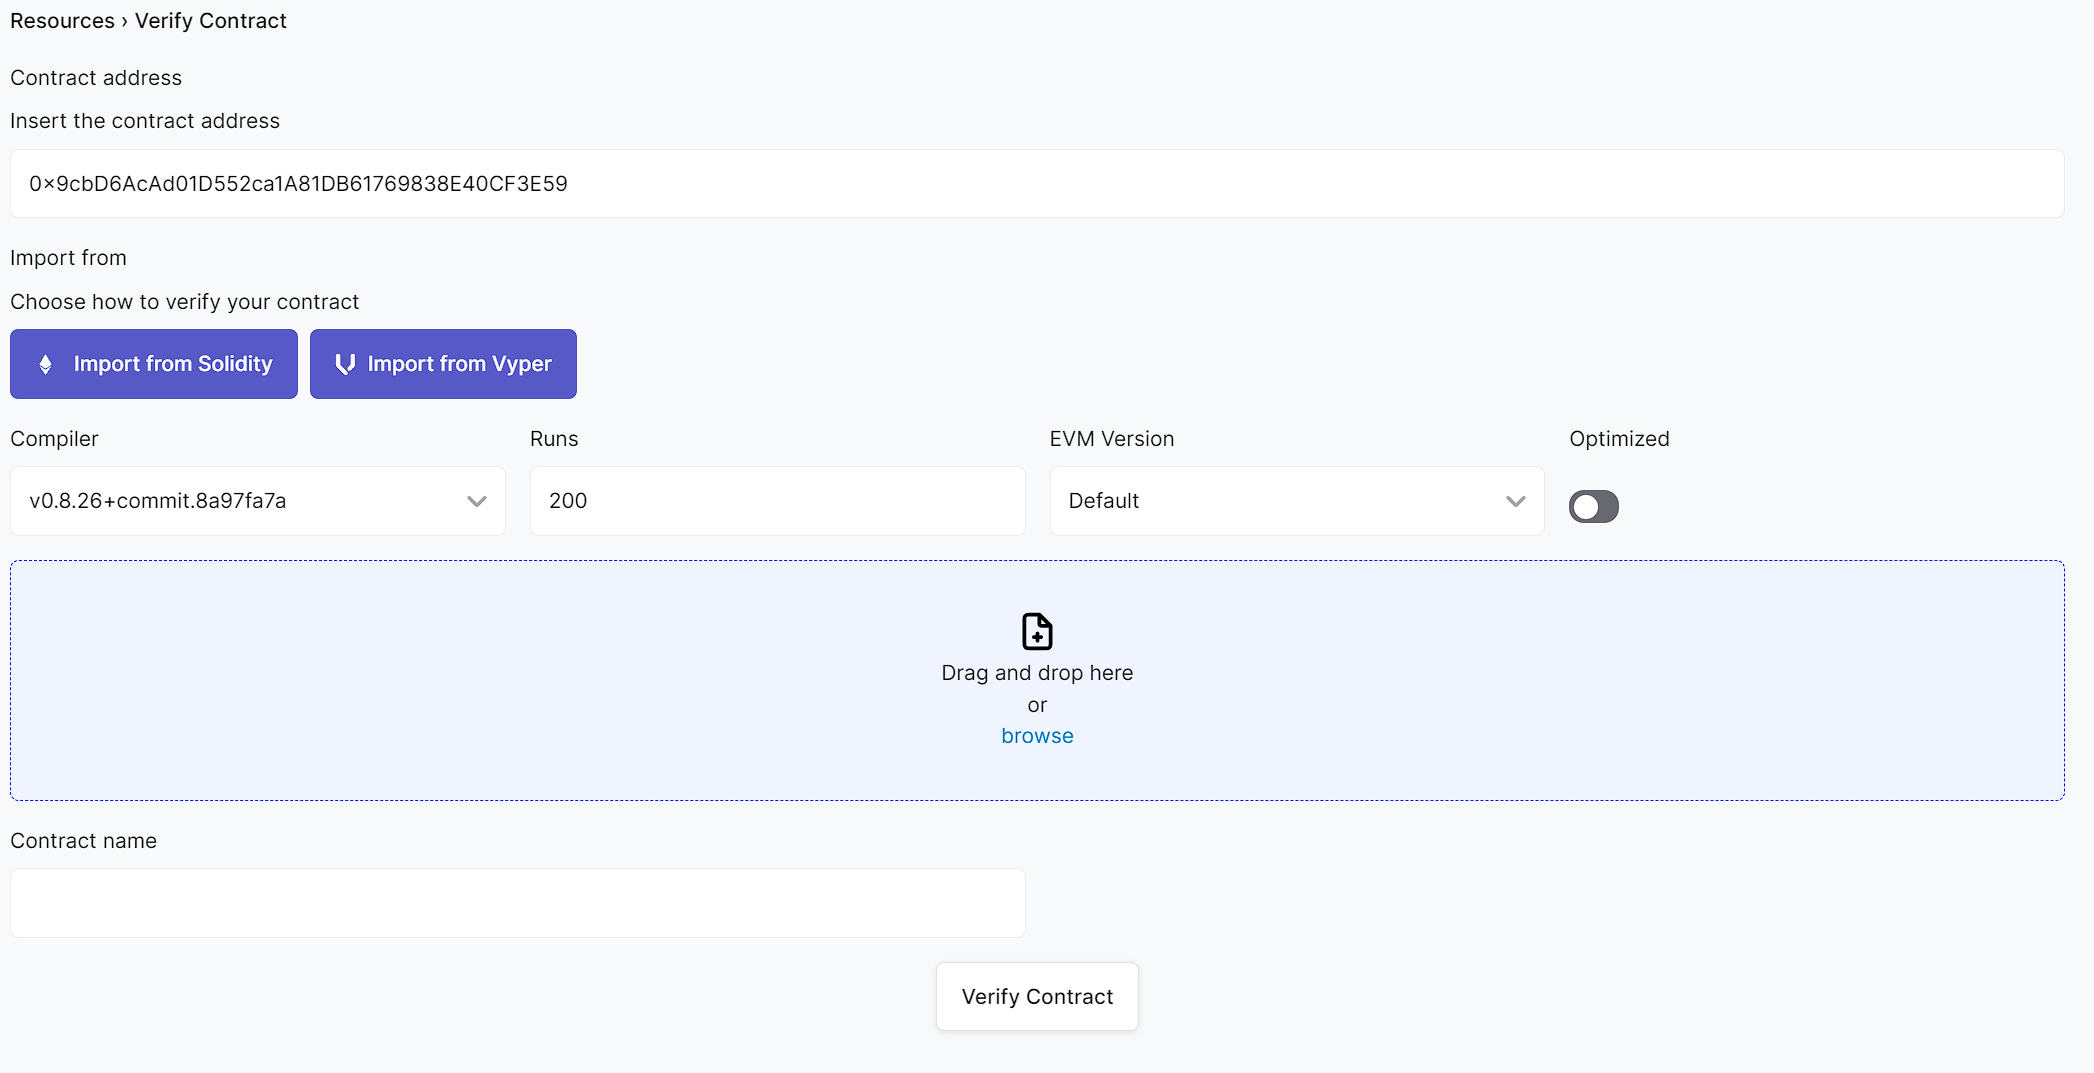
To verify your contract, use the FunkiScan verification tool. Follow these steps:
- Enter your deployed contract's address.
- Select your programming language.
- Provide the compiler information and upload your file(s). Ensure this information matches exactly what you used when compiling your contract for deployment. You can upload multiple files or a single flattened file.
- Click "Verify Contract" and await the result.
After successfully verify, you will be able to see your contract’s source code on FunkiScan just like this.
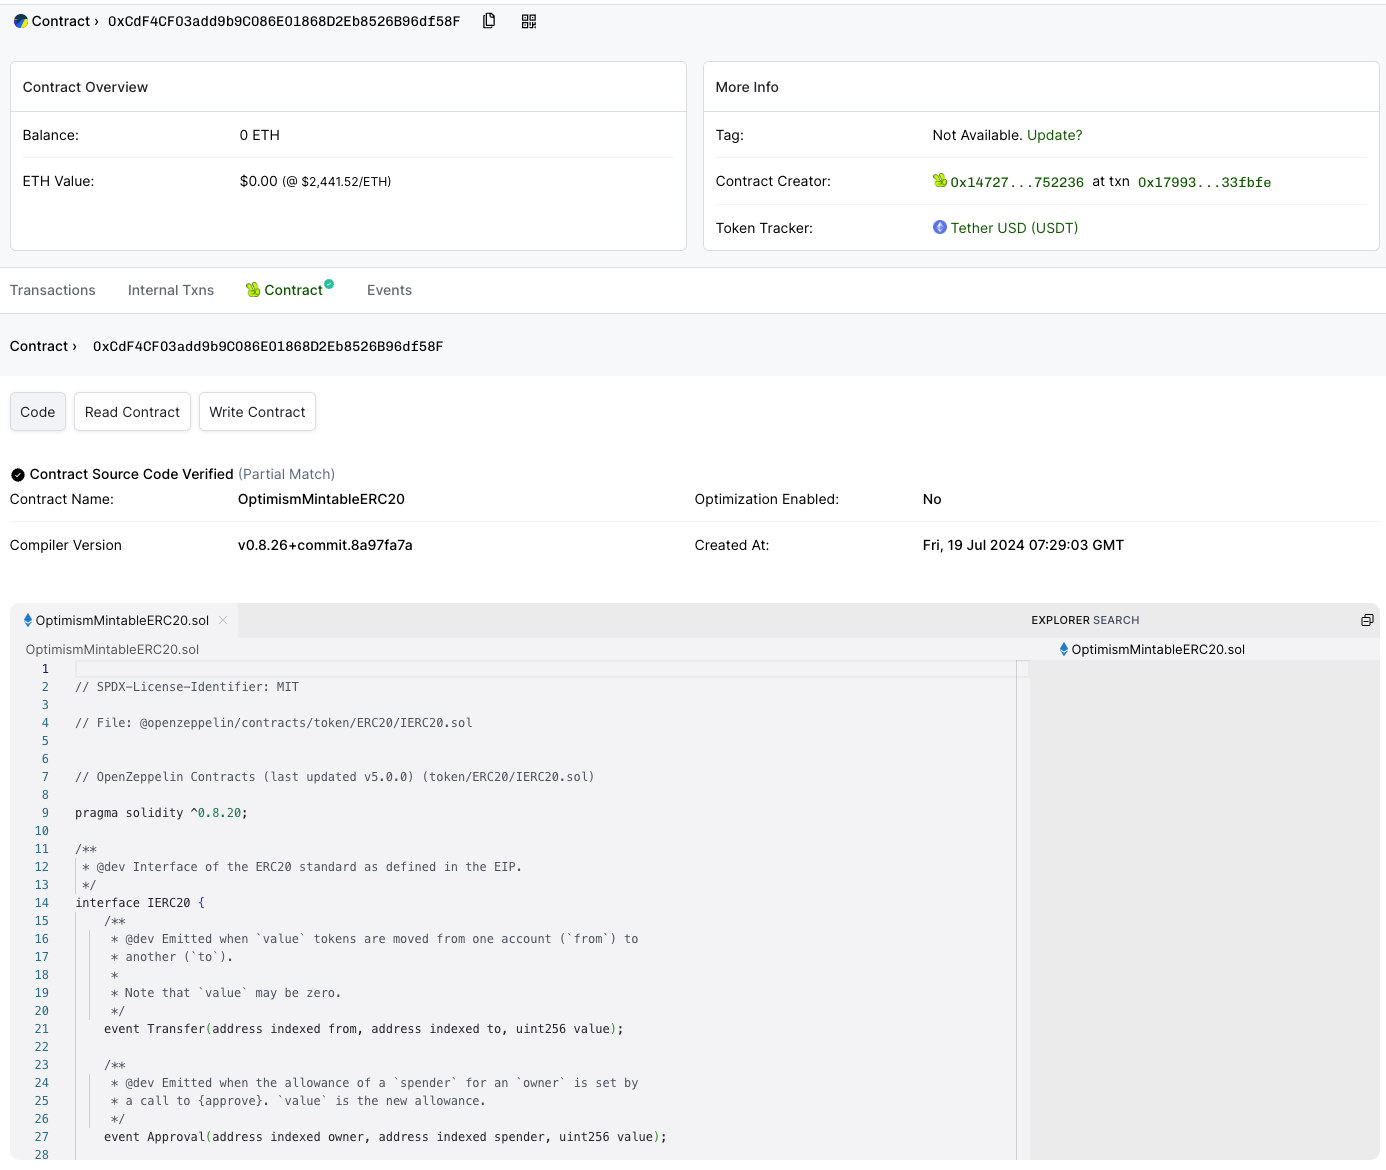
Interact with the Contract on FunkiScan
You can now interact with your contract using FunkiChain. Click the Contract tab. If your contract is verified, you'll see the contract's source code and all its functions under the Read Contract and Write Contract buttons. Note that only write functions require an on-chain transaction.
To interact with write functions, you need to sign in to FunkiChain with your wallet. Currently, you can choose from any of the supported wallet providers that appear.
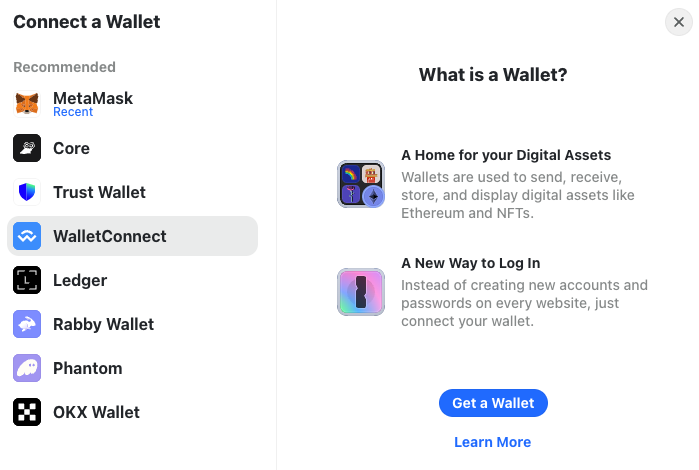
Once connected, you're all set to interact with any write function of the contract. Make sure your input is correct and double-check the transaction details before confirming any transaction.
Conclusion
Congratulations! You've now acquired the ability to deploy smart contracts on the blockchain. While you've only deployed to a test network so far, the process for real networks is identical—just with higher costs!